
You know that sinking feeling when your bike makes a weird noise, but you’re not sure if it’s serious? Or when you want to do some motorcycle maintenance or checks before a ride, but you’re not entirely sure how?
There are a large number of riders (both men and women), who are uncomfortable doing even basic checks on their motorcycles. This post is here to change that, without making it complicated or intimidating.
Don’t forget to download your FREE motorcycle maintenance checklist to help you remember everything.
*We work hard to make this the best motorcycle touring & tips website possible. The website is supported by our readers, so if you buy through links on this site we may earn a commission- at no extra cost to you. All opinions remain our own. Ride safe!
Motorcycle Maintenance- the challenge
Here’s the truth: many female riders (my past self included) feel like motorcycle maintenance is too complicated for us to handle. We’re told we need a mechanic for everything, or that we’ll somehow break our bikes by touching them.
Heck, I’m not entirely sure I know what all the bits on my motorbike are called, let alone how to maintain them all!
The good news is that you don’t need to name them all, or know how they all work, in order to do basic motorcycle maintenance.
While I always recommend asking a professional if you’re unsure, the reality is that being able to complete some basic checks yourself is:
- A- important for safety
- B- great for your confidence
- C- helps you get to know your bike better
- D- going to save you money from unnecessary garage visits
Even if you don’t know how to fix everything which might need doing on your motorbike, the more you do these basic checks and tweaks, the more you’ll be able to spot other problems or changes and know to get some advice on sorting them.
So, here are some motorcycle maintenance tasks which should be done regularly and can easily be completed by a beginner to ensure your motorcycle stays in tip-top running order, whether that’s for motorcycle touring, general riding or even track days.
5 essential checks that keep you riding safely
Here are 5 checks to do before each ride (further explanations below!)
- ✅ Battery and electrical connections – eliminate the most common breakdown cause
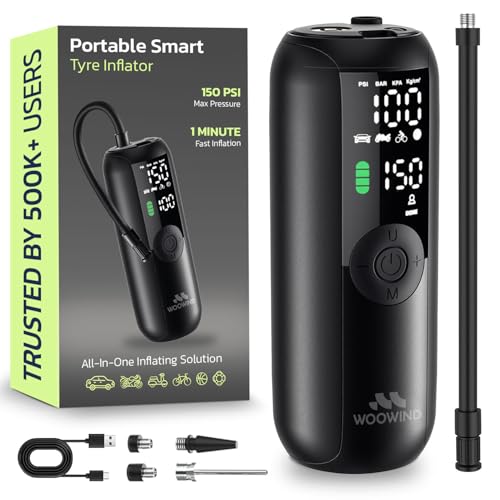
- ✅ Tyre pressure and condition – spot problems before they leave you stranded!
- ✅ Chain tension and lubrication – prevent expensive damage and dangerous failures
- ✅ Brake system basics – ensure your bike stops when you need it to
- ✅ Oil levels – avoid catastrophic engine damage
These checks don’t require mechanical knowledge. You don’t need to understand how everything works – you just need to know what “normal” looks like, and what doesn’t.
You’ll know when something actually needs professional attention versus when it’s just normal wear. And you’ll never again have that helpless feeling of not knowing if your bike is safe to ride.
And, just as importantly, you’ll join the growing community of women who refuse to be intimidated by their own motorcycles. 💪
Free Motorcycle maintenance checklist
Want a FREE PDF motorcycle maintenance checklist to download and print? Here you go:
What happens if you fail to carry out motorcycle maintenance tasks?
In case you’re not convinced, here are some of the things which could fail/ break/ go wrong if you don’t regularly maintain your motorcycle:
- Tyres: All good tyres have tread wear indicators. If they wear below these levels, you will lose grip and the tyre becomes unstable.
- Chain: Chains look tough but they stretch under acceleration. Also, road dirt can cause the rollers to deteriorate over time. Let the chain get too loose and it may jump the sprocket and lock the back wheel. A poorly lubricated chain will also wear out the sprockets a lot faster.
- Brake Pads: If you let your brake pads wear too thin, you are at risk of brake failure. The metal backing plates will also grind on the discs and cause severe damage to your discs.
- Engine Oil: Motorcycle engine oil provides a layer of protection between the fast-moving parts in your motorcycle’s engine. Over time, the oil gets thinner and full of contaminates. When this happens, the engine overheats, loses power and may eventually cause engine failure.
- Oil Filter: The multiple layers of the oil filter strain metallic debris and contaminants from the oil. When the filter clogs, engine oil deteriorates rapidly.
- Fuel Filter: Forget to clean your fuel filter periodically and debris and dirt from inside the tank will, over time, prevent fuel flow.
- Air Filter: Allow your air filter to get clogged with dust and dirt and it will affect the flow of air into the combustion chamber. When this happens it can result in rough tick over and power loss.
It’s a similar story for every part of the motorcycle where one component is in contact with another, whether fork seals or wheel bearings. This contact causes friction, which results in wear or heat and heat leads to expansion. Whatever the cause of friction, the result is the same; leave it too long and the part will fail.
Motorcycle Maintenance – ask for help
Before I dive in to the rest of the post, I’d like to make one thing really really clear. It’s ok to ask for help. Ask a professional, a trusted friend or check out some of the good YouTube channels where you can follow along as they maintain their bikes. (I’m also on YouTube, but I don’t have a video on how to maintain your motorcycle- yet!)
We’ve written this post to help you understand basic motorcycle maintenance tasks which you can do yourself at home or out on the road. But, if you’re in any doubt, please ask a mechanic to show you.
It’s one of those things that ‘once you know, you know’, but please don’t start messing around with your chain or other parts of your bike without knowing what you’re doing!
Most important motorcycle maintenance tasks: breakdown
Here’s a more in-depth look at the 5 essential motorcycle checks and what to look for.
🛞 1. Tyre Pressure and Checks
How many times have you gone to ride your motorcycle after a time away, and thought the tyres look a little flat? Or worse, how many times have you gone for a service and been told the tyres were worn/ cracked/ bald/ damaged in some way?
Here’s the truth: you don’t need to be a mechanic to spot tyre problems. Your eyes and hands can tell you almost everything you need to know.
What to look for (takes 2 minutes):
✅ The visual check: Look at your tyres straight-on. Do they look round and properly inflated, or do they appear to be bulging at the bottom? A properly inflated tyre should look firm and round, not squashed or flat-looking where it touches the ground.
✅ The pressure test: Press your thumb firmly into the sidewall (the side part of the tyre). It should feel firm with just a little give – like pressing a tennis ball. If it feels squishy or your thumb leaves a deep indent, it needs air.
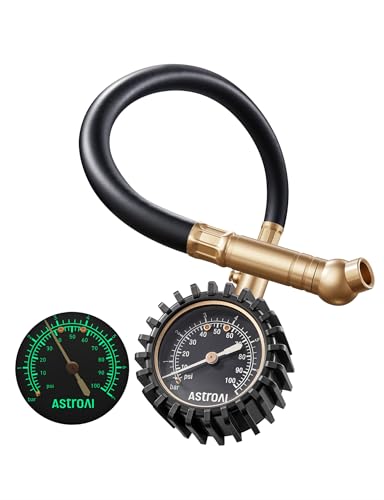
(This is a quick check – to be sure, use a proper pressure gauge.)
✅ The tread check: Look for the small raised bars that run across the tyre grooves. If they’re level with the surrounding rubber, your tyre needs replacing. Also check for any cuts, cracks, or objects stuck in the tread.
Important notes:
- Tyre pressures should always be checked cold (before riding) because heat raises the pressure.
- Your bike’s manual or a sticker on the bike will show the right pressure (usually something like 36 PSI).
- Most petrol stations have pressure gauges – just ask if you need help using one.
When to act: If anything looks off, don’t ride until it’s sorted. Under‑inflated tyres can cause loss of control, especially in corners. Over‑inflated tyres give you less grip on the road.
Tools you might want:
⛓️ 2. Chain Tension and Lubrication – It’s Simpler Than You Think
I used to avoid checking my chain because it looked intimidating. Then someone showed me the finger test and I realised I’d been worrying about something that takes 30 seconds.
Your chain is what transfers your engine’s power to your rear wheel. If it snaps or comes off, you’re not going anywhere – and it can cause expensive damage. It can also be catastrophic if it snaps at high speed.
The simple chain check:
✅ Tension test: Put your bike on its centre stand (or have someone hold it upright if you don’t have one – a paddock stand works too). At the lowest point of the chain, you should be able to lift it about 1–1.5 inches (roughly two fingers’ width), although please check your manual for your specific bike’s requirements, as this can vary. Too loose and it might jump off the sprockets. Too tight and it could snap.
Your motorcycle manual should have a guide on what your chain should look like at the correct tension. It will also tell you how to adjust the tension and what torque settings you should use (you’ll need a torque wrench to do this properly.)
✅ Look for wear: A healthy chain should look evenly spaced with no kinks, stiff links, or rust. If you can see daylight between the links and the rear sprocket teeth, or if the links look stretched, it needs professional attention.
✅ Lubrication check: The chain should look slightly moist, not dry and dusty, but also not dripping with oil. A well‑lubricated chain moves smoothly and quietly.
What you can do: Clean off old dirt with a brush and apply proper chain lube after rides when the chain is warm (never just before riding). Wipe off any excess so it doesn’t fling onto your rear tyre.
When to get help: If the chain looks damaged, makes grinding noises, or you’re not sure about the tension, ask a professional. A chain adjustment involves specific tools and torque settings.
Remember: you don’t need to understand how it works – just recognise when something doesn’t look right.
How often should you lubricate your motorcycle chain?
This is one of the most common questions asked by newbie bikers who have heard horror stories about chain maintenance. You’ll be pleased to know that most modern motorcycles have ‘o’ ring chains, which require much less maintenance than older style ones.
The chain needs cleaning when it is particularly dirty, or at the mileage recommended in your owner’s manual. Do to this, put the rear wheel of your bike on a paddock stand or use the centre stand and put it in neutral gear, which allows the chain to move easily.
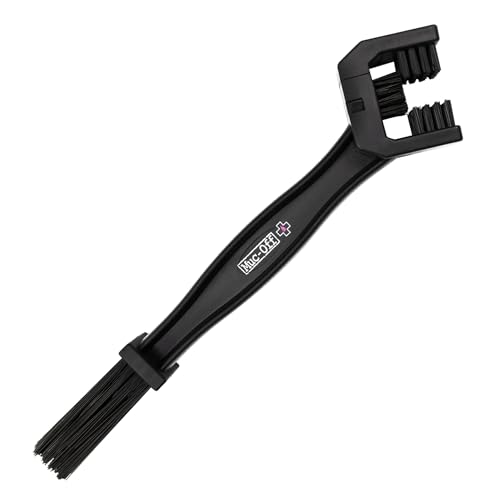
Use a specific chain brush to make sure you get all the dirt and gunk off the chain. Then, once clean, rotate the back wheel while applying proper chain lube. You want to evenly coat the chain, and get the lube to penetrate past the O-rings to grease the joint. Once you’ve done an entire rotation, let it sit for at least 5 minutes (ideally overnight), then wipe off the excess with a paper towel or dry rag.
TOOLS NEEDED: Chain Brush, lube

🛑 3. Brake System Safety Check
Your brakes are literally what keep you alive. That sounds dramatic, but it’s true. The good news? Checking if they’re working properly is one of the easiest things you can learn to do.
You don’t need to understand hydraulics or brake mechanics. You just need to know what healthy brakes look, feel, and sound like.
The brake lever test:
✅ Feel: When you pull your brake lever (front) or press your brake pedal (rear), it should feel firm and responsive. If it goes nearly to the handlebar or feels spongy, something’s wrong. NOTE: If you have ABS, don’t panic if you feel pulsing in the brake lever during emergency stops – that’s the ABS working as designed.
✅ Sound: Brakes should work quietly or with just a gentle swoosh. If you hear grinding, squealing, or scratching, stop riding immediately.
Visual brake pad check:
Look into your brake callipers (the metal parts that clamp onto your brake discs). You should be able to see your brake pads – they look like thick rectangular blocks. If they’re less than 2–3 mm thick (about the thickness of a £1 coin), they need to be replaced soon.
Brake fluid check:
Look for your brake fluid reservoirs (usually small plastic containers with level marks- check your manual). The fluid should be clear or slightly yellow, not dark brown or black. It should be between the minimum and maximum marks.
What to do if something’s wrong:
- Spongy lever = get it checked immediately.
- Grinding noise = stop riding, get help.
- Low fluid = top up with the correct type, but also investigate why it’s low.
- Thin pads = book a replacement soon.
When you’re out of your depth: Brake work involves safety‑critical components. If you’re not sure about anything, always ask a professional.
🛢️ 4. Oil Level Check – Easier Than Checking Your Car
I used to think checking oil was somehow advanced motorcycle maintenance. Then I realised it’s actually easier than checking the oil in most cars – and just as important.
Your engine oil keeps all those fast‑moving parts from grinding against each other. Without enough oil, or with oil that’s too old and dirty, your engine can seize up completely – an expensive mistake you definitely want to avoid.
The oil level check (takes 1 minute):
✅ Get your bike level: Park on level ground and make sure your bike is upright, not on the side stand. Get someone to hold it for you or use a paddock stand if you don’t have a centre stand on your motorbike.
✅ Warm it up slightly: A cold engine gives a false reading. Run your bike for just a minute or two, rev it a bit, then turn it off and wait 5 minutes for the oil to settle.
✅ Find your oil level indicator: This is either a dipstick (like a car) or a small window in the engine case. Your manual will show you exactly where to look.
✅ Read the level: The oil should be between the minimum and maximum marks. If it’s below minimum, you need to add oil. If it’s above maximum, you have too much (which can also cause problems).
Check the oil condition:
- Colour: Fresh oil is usually amber or black but (and this may sound odd) it looks quite ‘thin’. If it’s very dark and thick, or has metallic particles in it, it needs changing. Note: Some bikes use different oil colours (fully synthetic can look quite dark even when fresh), so check your manual for what’s normal for your bike.
- Consistency: It should flow like… well, like oil. If it’s thick like treacle or has lumps in it, book a service and ideally don’t ride it or you may damage your engine.
What you can do: Adding oil is straightforward – just remove the filler cap and pour in small amounts until you reach the right level. Always use the oil type specified in your manual. Don’t overfill.
When to get help: If your oil level drops quickly, you have a leak that needs professional attention. If you’re not sure what type of oil to use, ask rather than guess (your manual will probably tell you.)
🔋 5. Battery and Electrical Motorcycle Maintenance– Less Scary Than You Think!
A dead battery doesn’t care if you’re 5’2″ or have small hands – it’ll leave you stranded just the same. But here’s what nobody tells you: most battery problems are actually dirt and corrosion, not the battery itself.
I learned this the hard way when my bike wouldn’t start before a weekend trip. I was convinced I needed a new battery, but five minutes of cleaning sorted the problem completely.
The visual battery check:
✅ Locate your battery: It’s usually under the seat or behind a side panel. Your manual will show you exactly where.
✅ Look for corrosion: The terminals (where the cables connect to the battery) should be clean and tight. If they’re covered in white or green crusty stuff, that’s corrosion and it stops the electrical connection working properly.
✅ Check the connections: The cables should be firmly attached with no loose bolts or frayed wires visible.
✅ Battery condition: If you can see the battery itself, it should be clean and dry with no cracks or bulges.
The simple cleaning routine:
If you spot corrosion, you can clean it yourself. Turn off your bike, remove the cables (negative first, positive second), and clean the terminals with an old toothbrush and some coke or baking soda mixed with water. Rinse with clean water afterwards and dry thoroughly before reconnecting (positive first, negative second).
Always wear gloves when cleaning battery terminals to protect your hands from corrosion
When your bike won’t start:
Before assuming it’s the battery, check that your kill switch is off, you’re in neutral, and you’re not accidentally holding the clutch lever. It’s amazing how often it’s something simple!
Testing the battery:
Many auto shops will test your battery for free. A healthy battery should hold about 12.6 V when the engine is off, and around 13–14 V when running.
When to get help:
If cleaning doesn’t solve starting problems, or if your battery is more than 3–4 years old and struggling, it probably needs replacing. This is usually a straightforward job, but if you’re not comfortable with electrics, ask a professional for help.
(Modern sealed batteries shouldn’t be opened or topped up, so just replace when needed.
Other important motorcycle maintenance tasks
Other things to do include
- Visual examination/ walk around- know what’s ‘normal’ and what’s not
- Check filters
- Clean your motorcycle
How often should basic motorcycle maintenance be done?
As I mentioned above, HOW often you should do the above tasks can vary greatly depending on bike, biker and use.
Some parts of a motorcycle need more maintenance or replacing more often than others. These are mostly things called ‘consumables’:
- Tyres
- Brake Pads
- Fluids which need replacing regularly, like oil
- Filters, especially oil and air filters
- Chain- it might not need replacing, but will need lubing and checking
These five items are all subject to high wear and should be the cornerstone of any maintenance routine checks.
The first place to check should always be your motorcycle manual. Here you should find a motorcycle maintenance schedule, as recommended by the manufacturer. It will either refer to a period of time, regardless of how much you’ve used the bike, or in terms of mileage.
To make things easier, we’ve split the motorcycle maintenance into timed categories. These are once a week inspections, scheduled checks and periodic maintenance. Of course, if you’re using your motorcycle to commute from Edinburgh to London every week or if you’re a motorcycle courier, you’ll probably need to do some of these more frequently.
Recommended Motorcycle maintenance schedule- before every ride/ weekly checks
A walk around before each ride only takes a few minutes but could save your life. Most of the checks are visual and should become second nature while your bike is warming up (it needs at least 30 seconds to get the oil moving after being stationary). You can even do most of them as you put on your helmet and gloves if you’re really in a rush, but don’t skip them.
Here’s what to look for on your walk around. If you find any problems, don’t ride until they’re fixed:
- Look for leaks. There shouldn’t be any. Ever. If you have a puddle on the floor, sniff it to find out whether it’s water, oil or fluid. Look near your fork seals- streaks here suggest they may have failed.
- Check air pressure and inflation of tyres. You can do this using a pressure gauge, but many bikers do it visually or by pressing on the tyre. A gauge is much more accurate
- Check chain tension. See above for more details on how to do that
- Also check the chain is well lubricated. A dry or rusting chain can snap- which will cause you all sorts of problems. It’s best NOT to lube the chain just before you ride. Ideally do it afterwards then leave overnight
- Check lights/ indicators/ glass for any damage caused by stones
- Check clutch and brake lever when sitting on your motorcycle. Give a quick flick to the light switch to check the bulbs are working
- Give your brakes (front and rear) a quick test as you’re riding away.
And that’s it for daily/ weekly checks. The whole thing takes just a few minutes unless you find something which needs attention. Don’t forget to listen to your motorcycle as you’re riding. Any strange noises, clicks, bangs or loss of power need investigating asap.
Motorcycle basic maintenance- monthly checks and tasks
Some of these could fall into the 300-500 mile jobs; it depends how often and how far you ride.
This type of maintenance is all about checking wear rates in more detail. Doing this may mean you will need to adjust the drive chain, top up the oil, brake and coolant levels or replace brake pads, oil and filters. Some basic tools will probably be required.
- Check fluid levels for the brake, clutch, coolant and engine oil via sight windows or dipsticks. Your manual will show you where to find each and how to top them up. Make sure bike is level when you do this (NOTE: You also have steering fluid: we recommend beginners leave this to a garage to check at least once a year.)
- Checking the engine oil level is as straightforward as removing the dipstick or checking the sight glass. A warm engine will give a better indication of oil level- make sure bike is level. Engine oil needs to be replaced roughly every 5000 miles (more if off-roading.)
- Check brake pads for thickness/wear- you can either do this with them in situ or remove the retaining pins to drop the pads out, depending on your type of caliper. Look at the thinnest/ most worn area (which isn’t usually the edge!) Brake pads come in pairs; if one needs replacing, replace both. You might prefer to get a mechanic to do the replacing if needed.
- Inspect chain. You might find this easier if the rear wheel is off the ground, using a paddock stand or main centre stand. Cleaning the chain is a great way to inspect it too. See below for more details.
- Check filters, especially air filter, which can get choked up. You can choose to wash it out or replace it. Engine oil and filters aren’t usually visible unless you want to strip the whole bike down regularly (one of my husband’s favourite hobbies…!) The best way to maintain these without a full engine check is to keep a note of the mileage at the time of the last change and check your oil levels regularly. Oil filters are generally changed when oil is changed.
- Inspect cables; they should be well attached and not coming loose anywhere.
- Check pivot points and moving parts. Do they need greasing? These include kickstand, swinging arms and bearings.
- Check battery- you’ll be pleased to know modern motorcycle batteries are MUCH more reliable than older bikes and don’t require much maintenance. However, check terminals for corrosion, check connections are secure and check levels if it’s been stood for a while.
- Check nuts, bolts and screws: things can work loose surprisingly quickly with the vibrations of a bike over time. Check regularly to ensure nothing needs to be tightened up. This includes handlebars, mirrors, mudguards, luggage racks, wheel nuts, panels and anything else that uses fasteners.
- Do a better check on the tyres. Apart from pressure, look for tread depth and examine the rubber for cracks, nails, dry rot or the rubber breaking down. Most tyres last around 5 years, but a frequently ridden bike will probably need a new set much sooner.

Motorcycle Maintenance – yearly checks
There are plenty of other moving parts on a motorcycle, which should be checked at least once a year. Most of these maintenance jobs will require a skilled mechanic who knows what they’re doing- so we don’t recommend these for beginners, but here are some examples so you know what jobs needs doing:
Engine
- Air filter change: Change your motorcycle’s air filter at about 10,000 miles or every year. If riding regularly in dust or dirt, you may need to replace it more frequently
- Cam chain tensioner: Manual cam chain maintenance should take place during recommended service intervals or once yearly
- Carburettor: Tune and adjust for idle speed every 6 months. Use carburettor cleaner 2-3 times a year.
- Coolant: If your bike has a radiator, checking and replacing the coolant will be a ‘to-do’ on your motorcycle checklist. Change every 25,000 miles or 2 years. Changing the coolant won’t be a problem if you can do an oil change. Have a thorough read of the owner’s manual to locate the drain bolt and header tank.
- Fuel filter: Change this component every year, regardless of whether there are signs of build-up or clogging
- Engine oil and filter: Change at around 3,000 miles for mineral oil and 5,000 miles for synthetic oil
- Injectors: Clean fuel injectors every 50,000 miles
- Valve adjustment: Check out at around 30,000-40,000 miles
Frame
- Bearing grease nipples: Grease once a year
- Steering head bearings: Excluding sealed bearing types, periodically lubricate every 2 years or at 15,000-20,000 miles
- Sub-frame: Carry out a visual inspection once a year
- Swinging arm bearings: Clean and grease every 10,000 miles or annually
Motorcycle parts
- Brakes: Change pads when wearing thin.
- Brake callipers: Check for leaks or piston wear every year or at 8,000 miles
- Brake fluid: Check levels every 3,000-6,000 miles and replace every 2 years
- Brake lines; Some manufacturers recommend replacing rubber brake lines after 4 years. Replace wire braided hoses every 6-10 years
- Drive chain: Inspect, lubricate and adjust every 1,000 miles
- Tyres: Check tyre tread regularly. Change every 5-6 years if not before. If a motorcycle is stationary for 12 weeks or more, its tyres may have dry rot; check for rubber discolouration every 4 weeks
- Wheel bearings and seals: Inspect every year or at 10,000 miles
- Wheels: Inspect and adjust spokes when needed
Suspension
- Fork oil: Change every 2 years or at 15,000 miles
- Fork seals: Change every 2 years or at 15,000 miles
- Rear suspension linkages: Service every 6-12 months or at 8,000 miles
Electrics
- Battery: For lead/acid batteries, check every 4 weeks and every 12 weeks for gel types. Inspect the battery terminals, clamps, cables and screws for corrosion, breakage or loose connections.
- Headlamp light: Examine every year or at 8,000 miles
- Indicators: Examine every year or at 8,000 miles
- Spark plugs: Check every 4,000 – 5,000 miles. Replace at 8,000-10,000 miles.
- Taillight: Examine every year or at 8,000 miles
- Wiring harness: Inspect every year or at 8,000 miles

Basic Motorcycle maintenance tips
Here are some tips for beginners to motorcycle maintenance, from bikers who do most of it themselves:
Build your tool kit for you and YOUR bike: It may be tempting to buy a multi-item, ready-made tool kit. However, these often include items that you don’t need. Tool kits are personal items. Start with the basics and slowly build up the kit as you discover new tools to make maintenance jobs easier.
It’s well worth investing in a proper toolbox with sections which ensure tools are separated and easy to find when you need them.
Budget tools are usually ok: Good quality spanners and socket sets are inexpensive, so don’t think you need to break the bank with big-name brands. A quick browse through an owner’s blog for your specific motorcycle should reveal a thread where members share their thoughts on the best budget tools.
A clean workspace is a safe workspace: Some consumables are flammable, so keep them safely stored. Don’t leave tools or open containers on the floor. A kicked-over motorcycle oil or brake fluid container is a potential accident.
Make sure you can account for all your spanners, sockets and screwdrivers at the end of a job; doing this will help you avoid leaving anything behind a body panel or under the tank!
Diagnosing motorcycle breakdowns
If you ride often enough and far enough, at some point you’ll likely find yourself stuck on the side of the road (if you’re motorcycling in France, be sure you have your hi-vis jacket on!)
It can be completely intimidating when your bike isn’t working properly, especially if you’re touring solo, so here’s a quick diagnostic check for you.
Generally speaking, a motorcycle requires these things to run:
- air
- fuel
- spark
- compression
If your bike suddenly stops working, here are some simple things to check to try to figure out the problem.
- Do you have fuel in the tank?
- For air, is your filter clogged? Airbox flooded?
- Are your spark plugs in good condition?
- Is the battery ok and connected?
If your bike won’t start at all, check the following:
- kill switch on (we’ve all done it!)
- battery connected?
- spark plugs sparking?
- Don’t try and twist throttle while starting- you’ll flood the engine. Give your bike at least 30 seconds to warm up before revving.
- Too little fuel is just as bad as too much- check you have fuel in tank
What maintenance tools do you need in your garage?
Motorcycle manufacturers once supplied a basic under the seat toolkit. These tools were enough to carry out basic maintenance (for BMW owners, this kit even featured a hand cleaner and BMW embossed cloth!)
Today, tool kits are often optional extras on new bikes and many second-hand bikes have lost their kits long ago.
The good news is that quality tools can be affordable. However, DON’T rush out and buy all these. Buy each one as a job comes up, so you’re not wasting money on something you’ll never use. If something sounds too complicated and you’d rather a mechanic did it, that’s ok.
A toolkit for basic and more advanced motorcycle maintenance could include:
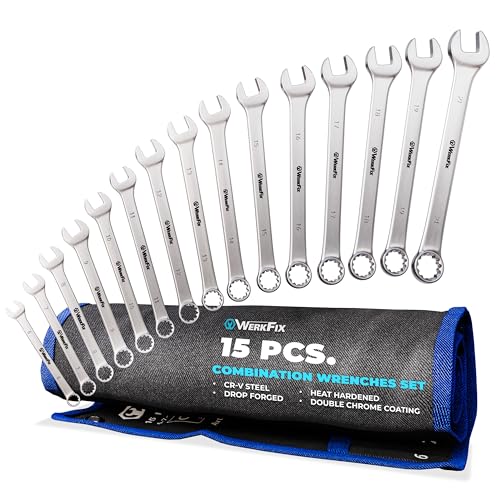
- Spanners
Most modern motorcycles use metric nuts and bolts (do check first), so a set of metric spanners covering 6-30mm should be enough for most jobs. Also, add any oversize spanners you may need to your kit, like an axle nut spanner or bleed spanner for the brakes.
It’s also a sensible idea to invest in a torque wrench. You will need this if you have nuts, bolts or fasteners that require tightening to specific torque values.


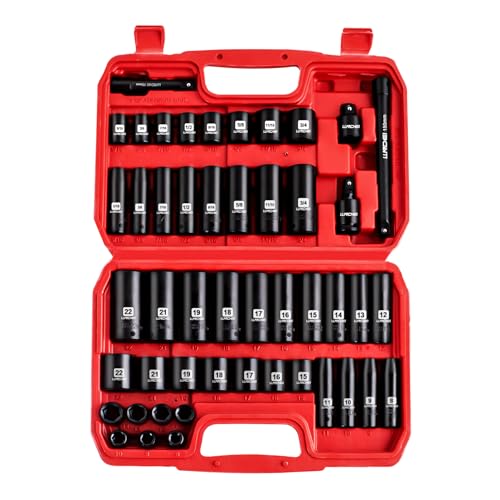
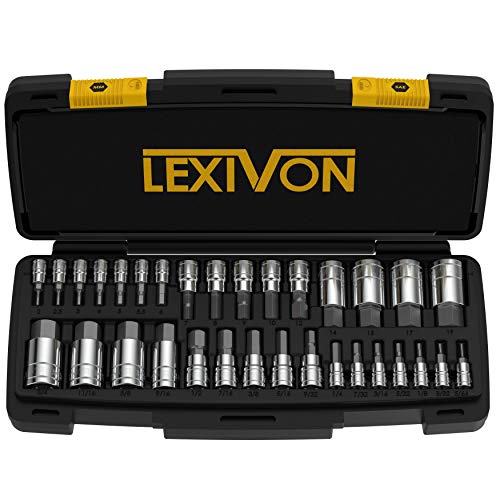
- Socket Set
A socket set should cover the same size range as your spanners, not forgetting any over or under-size sockets for specific jobs. Don’t overlook a long-reach spark plug socket, either if you’re considering changing your own spark plugs (not a task I’d recommend for beginners)

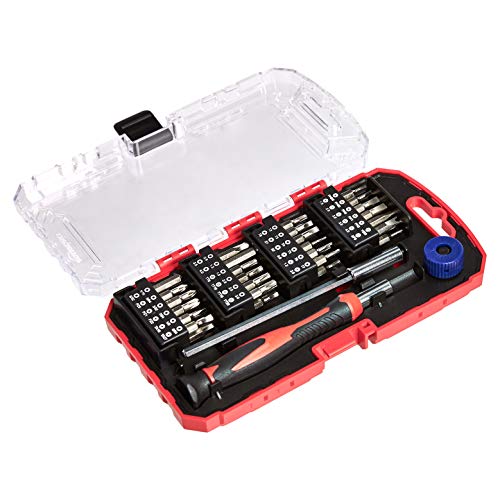
- Screwdrivers
It’s easier to buy screwdrivers as a set rather than individually. Make sure your set includes small, medium, large crosshead (Philips) and flathead screwdrivers and Torx and hex heads. You can also get these as a set of bits to fit onto a ratchet screwdriver. A set of allan keys is a good idea too.

- Pliers
Apart from standard or combination pliers, you should also include long nose and circlip pliers and some long nose and wide mouth adjustable grips


- Measuring Devices
If you need to measure the thickness of the brake pads, a micrometre or vernier calliper will give you a very accurate reading. If that’s a little over the top to check your brake pads, you can also do the same job using a 12-inch steel ruler (make sure it has imperial and metric scales.)
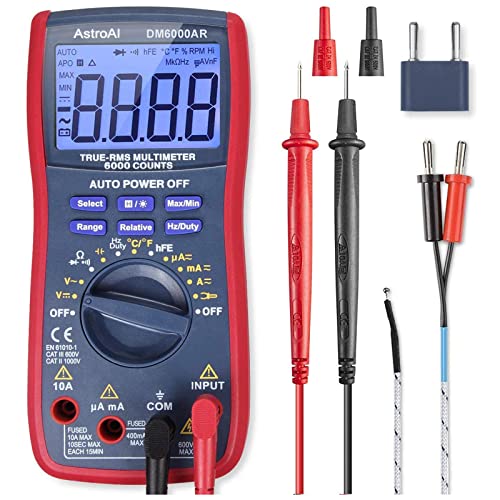
This category also includes a multimeter to test electrical connections and wiring. You can also check your motorcycle battery’s health using one.

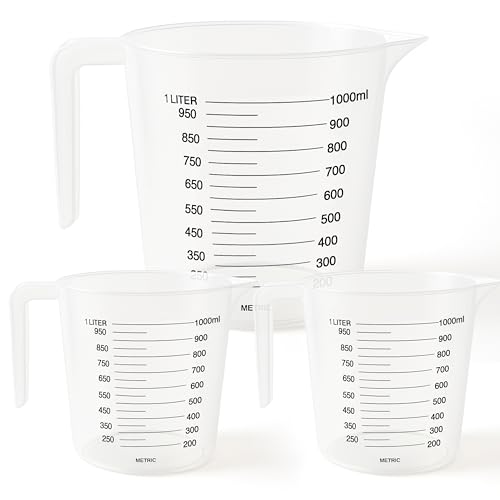
- Measuring Containers
Replacing the oil in your forks is usually an amount measured in millilitres. A measuring jug is essential for this job, as the precise amount needs to go into both fork legs. Measuring jugs often have a dual scale in ml (millilitres) and cc (centilitres).
A plastic jug & small funnel are also a great help when topping engine oil in tricky-to-reach fillers. You can also use it when bleeding the brakes.

- Fluid Catchment Pan
While you can use household pans or roasting tins to collect old oil or coolant (can you hear housewives sighing across the nation!), a specific plastic fluid pan is inexpensive and likely to promote marital bliss. It also doubles as a sealable container to transport old oil to the recycling centre for safe disposal.


- Clean Rags
A bundle of clean rags is helpful for a multitude of reasons. The list is endless, whether cleaning grime away from oil-level windows or protecting the paintwork from brake fluid.


- Chemicals, Fluids and Consumables
Keeping some engine oil and brake fluid in your workspace for topping up is a good idea. You should also include chain lube, brake cleaner, degreaser, penetrating oil, such as 3in1, WD40, hand cleanser and bike cleaner.
Nitrile gloves are also a smart move when carrying out any motorcycle maintenance. These gloves can protect you from grazed knuckles and prevent dirt and oil from getting into cuts and scrapes.


- Inspection Light
An inspection light is yet another item that is easy to overlook. It is worth its weight in gold if you are trying to locate tucked-away drain plugs or components under petrol tanks or behind body panels.
Inspection lights come in many different shapes and sizes, including ones with magnetic bases or clamps. A small head mount torch will leave both hands free and can also pull double duty as part of your essential roadside toolkit.
Cordless lights mean you won’t be tripping over wires. Also, opt for an LED light with rechargeable batteries.


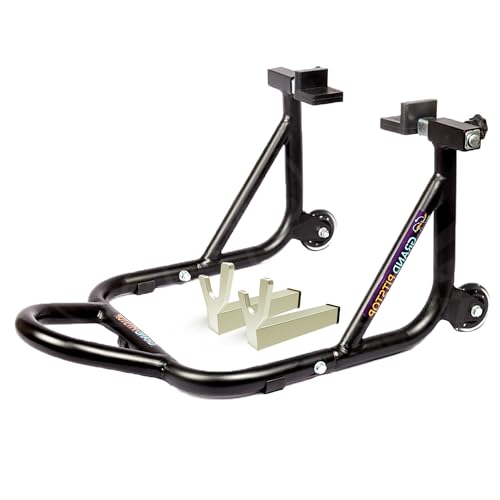
- Paddock Stand
Not all motorcycles have a main centre stand. So if you need to get the front or rear wheel off the floor, you will need a paddock stand.
Several different types are available. These either fit onto bobbins attached to the swinging arm or have universal lifting arms that secure under most double-sided swinging arms.
Most paddock stands come in pairs, with a front and rear stand. Specialist stands for single-sided swinging arms are available and you can also get front-only stands that locate under the steering head.

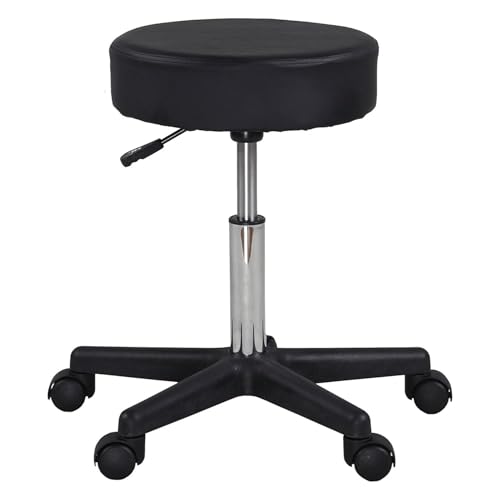
- Wheelie Stool
Last but not least is the workshop wheelie stool (nope, it has nothing to do with pulling wheelies sadly.) This item isn’t an essential kit but it does save a lot of wear and tear on your knees. Not everyone is lucky enough to have a garage or workspace. So if you carry out basic motorcycle maintenance outdoors, invest in kneepads.
Useful motorcycle maintenance books
Here are some really useful motorcycle maintenance books you might find helpful:


You might find these motorcycle maintenance logbooks useful too:
These are a great way to keep track of what has/ hasn’t been done on your motorbike, so you can refer back to it if needed.
Final thoughts on DIY motorcycle maintenance
You may now be questioning whether home motorcycle maintenance is worth the hassle. Not everyone is born with a spanner in their hand and I totally appreciate that this post can be daunting. However, it’s always a good idea to read your manual and start understanding a little about what your bike needs in terms of regular maintenance.
Sadly, it’s not enough to just read the manual (trust me, I tried). It’s important to actually sit down with your motorbike and follow some of the instructions in practical terms.
If you learn and do a little each week or month, you’ll be amazed at how quickly your knowledge grows. You’ll also feel ridiculously proud the first time you do something which involves making your bike better and safer, especially if it involves tools.
Following a routine maintenance schedule and using a motorcycle maintenance checklist will also help you feel more confident, as well as saving you plenty of money over time, which has to be a win-win for any biker. Still, don’t forget that even with regular checks, you will still need a full service (performed by someone who knows what they’re doing!) around every 5,000 miles or once a year (check your manual for the exact interval).
Ride safe 🏍️
🌟 Final thoughts
You’re not trying to become a motorcycle mechanic overnight. You’re simply learning to recognise when something needs professional attention.
👉 Do these quick checks regularly – they soon become second nature.
👉 Trust your instincts: if something looks, sounds, or feels wrong, it probably is.
👉 And there’s absolutely no shame in asking for help when you need it.

Kat has spent years touring the UK and Europe by motorcycle, car and motorhome. It was the idea of motorcycle touring which pushed her to go from nervous new biker to excited explorer and she still can’t believe some of the crazy mountain roads she’s ridden!
She has owned several motorbikes and currently rides a ZX1000, which is a fantastic touring bike. When not touring, you’ll find her scrolling Instagram for new road trip destinations, playing with her dog Mac or helping other bikers gain the confidence to have their own epic adventures.
Ride safe 🏍️
Alright, so my boyfriend’s bike has been collecting dust in the garage due to its numerous oddities and squeaks, similar to those of an old, rusty door. It’s like pulling teeth to get him to take it to a conventional bike shop, but a mobile bike repair service? To save that abandoned two-wheeler, we need that hero. Perhaps I should explain to him that maintaining a motorcycle’s engine properly isn’t the only thing that goes along with it; safety is another factor.
Must read blog for every women bike riders.
Informative blog.
Excellent maintenance guide girl riders.
Every girl rider must go through this blog.
A clean air filter is crucial for optimal bike performance, and this article makes it simple for riders to maintain their two-wheeled companions efficiently.
bike’s battery is checked regularly can save a lot of hassle on rides.
A quick reminder to fellow riders: don’t forget to check your bike’s headlights. Safety first
Checking the chin of the bike is often overlooked, but it’s a crucial part of ensuring overall bike health
Your blog is a go-to for insightful content! The engaging writing style and the information about the motorcycle maintenance is too useful keep me coming back for more. Well done!
Your articles are both insightful and engaging! I love your topic. Keep up the fantastic work